Nested resources
With the project resource CRUD done in chapter 4, the next step is to set up the
ability to create tickets within the scope of a given project. This chapter explores how to set
up a nested resource in Rails, by defining routes for Ticket resources and
creating a CRUD interface for them, all scoped under the Project resource that you just created. In
this chapter, you’ll see how easy it is to retrieve all ticket records for a specific project
and perform CRUD operations on them, mainly with the powerful associations interface that Rails
provides through its Active Record component.
Creating tickets
To add the functionality to create tickets under projects, you’ll apply Behaviour Driven Development
here again, writing RSpec specs with Capybara. Nesting
one resource under another involves additional routing, working with associations in Active
Record, and using more calls to before_action. Let’s get into this.
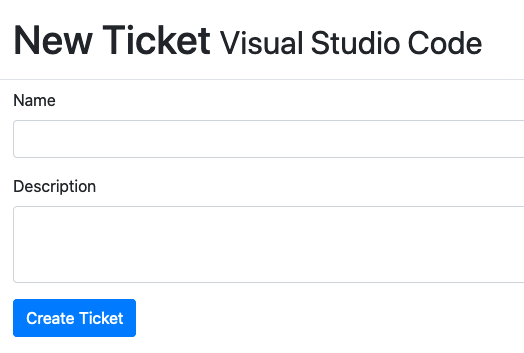
To create tickets for your application, you need an idea of what you’re going
to implement. You want to create tickets only for particular projects, so you need a "New
Ticket" link on a project’s show page. The link must lead to a form where a name
and a description for your ticket can be entered, and the form needs a button that submits it
to a create action in your controller. You also want to ensure that
the data entered is valid, as you did with the Project model. This
new form will look like:
Start by using the code from the following listing in a new file.
require "rails_helper"

RSpec.feature "Users can create new tickets" do
  before do
    project = FactoryBot.create(:project, name: "Internet Explorer")

    visit project_path(project)
    click_link "New Ticket"
  end

  scenario "with valid attributes" do
    fill_in "Name", with: "Non-standards compliance"
    fill_in "Description", with: "My pages are ugly!"
    click_button "Create Ticket"

    expect(page).to have_content "Ticket has been created."
  end

  scenario "when providing invalid attributes" do
    click_button "Create Ticket"

    expect(page).to have_content "Ticket has not been created."
    expect(page).to have_content "Name can't be blank"
    expect(page).to have_content "Description can't be blank"
  end
end
You’ve seen the before method before, in the last chapter when we were setting up the
project data we needed for our "Editing Projects" spec to run. Here we’re doing
a similar thing - setting up the project that our tickets will be attached to.
Your ticket objects need a parent project object to belong to (in our system a
ticket can’t exist outside of a project), so it makes sense to build one before
every test.
In the above spec, we want to make sure to test the basic functionality of creating a ticket. It’s pretty straightforward: start on the project page, click the "New Ticket" link, fill in the attributes, click the button, and make sure it works!
You should also test the failure case. Because you need to have a name and description, a failing case is easy: we click the "Create Ticket" button prematurely, before filling out all of the required information.
Now run this new feature using the bundle exec rspec
spec/features/creating_tickets_spec.rb command, both of your tests will fail
due to your before block:
1) Users can create new tickets with valid attributes
   Failure/Error: click_link "New Ticket"
   Capybara::ElementNotFound:
     Unable to find link "New Ticket"

# and the second error is identical
You need to add this "New Ticket" link to the bottom of the app/views/projects/show.html.erb
template, so that this line in the test will work. We’ll copy the format we did
for the projects index view, and build a header with the action link in it.
<header>
  <h2>Tickets</h2>

  <%= link_to "New Ticket", new_project_ticket_path(@project) %>
</header>
This helper is called a nested routing helper, and it’s like the standard routing helper. The similarities and differences between the two are explained in the next section.
Nested routing helpers
When defining the "New Ticket" link, you used a nested routing
helper—new_project_ticket_path—rather than a standard routing helper such as
new_ticket_path, because you want to create a new ticket for a given
project. Both helpers work in a similar fashion, except the nested routing
helper always takes at least one argument: the Project object that the ticket
belongs to. This is the object you’re nested inside. The route to any
ticket URL is always scoped by /projects/:id in your application. This helper
and its brethren are defined by changing this line in config/routes.rb:
resources :projectsto these lines:
resources :projects do
  resources :tickets
end
This code tells the routing for Rails that you have a tickets resource
nested inside the projects resource. Effectively, any time you access a
ticket resource, you access it within the scope of a project. Just as the
resources :projects method gave you helpers to use in controllers and views,
this nested one gives you the helpers shown in this table:
| Route | Helper |
|---|---|
/projects/:project_id/tickets |
|
/projects/:project_id/tickets/new |
|
/projects/:project_id/tickets/:id/edit |
|
/projects/:project_id/tickets/:id |
|
The routes belonging to a specific Ticket instance will now take two parameters -
the project that the ticket belongs to, and the ticket itself - to generate URLs
like http://localhost:3000/projects/1/tickets/2/edit.
As before, you can use the *_url or *_path alternatives to these helpers,
such as project_tickets_url, to get the full URL if you so desire.
In the table’s left column are the routes that can be accessed, and in the
right are the routing helper methods you can use to access them. Let’s use them by first
creating your TicketsController.
Creating a tickets controller
Because you defined this route in your routes.rb file, Capybara can now click
the link in your feature and proceed before complaining about the missing
TicketsController. If you re-run your spec with bundle exec rspec spec/features/creating_tickets_spec.rb,
it spits out an error followed by a stack trace:
1) Users can create new tickets with valid attributes
   Failure/Error: click_link "New Ticket"
   ActionController::RoutingError:
     uninitialized constant TicketsController

# and the second error is identical
Some guides may have you generate the model before you generate the
controller, but the order in which you create them isn’t important. When
writing tests, you follow the bouncing ball; and if the test tells you it
can’t find a controller, then the next thing you do is generate the controller
it’s looking for. Later, when you inevitably receive an error that it can’t
find the Ticket model, as you did for the Project model, you generate
that, too. This is often referred to as top-down
design [1].
To generate this controller and fix the uninitialized
constant error, use this command:
$ rails g controller tickets
You may be able to pre-empt what’s going to happen next if you run the test:
it’ll complain of a missing new action that it’s trying to get to by
clicking the "New Ticket" link. Let’s just re-run the test to make sure:
1) Users can create new tickets with valid attributes
Failure/Error: click_link "New Ticket"
AbstractController::ActionNotFound:
The action 'new' could not be found for TicketsController
So our next step is to define the new action. Open
app/controllers/tickets_controller.rb, and add the new action inside the
TicketsController definition, as shown in the
following listing.
new action from TicketsController
def new
@ticket = @project.tickets.build
endThere’s a lot of magic in this one line. We’re referring to @project but we
haven’t defined it, we’re referring to a tickets method on a Project instance
but we haven’t defined one, and we’re calling a method called build on whatever
tickets returns. Whew! One step at a time.
Demystifying the new action
We’ll start with the @project instance variable. As we declared in our routes,
our tickets resource is nested under a projects resource, giving us URLs
like those shown in the earlier table, which is reproduced below:
| Route | Helper |
|---|---|
/projects/:project_id/tickets |
|
/projects/:project_id/tickets/new |
|
/projects/:project_id/tickets/:id/edit |
|
/projects/:project_id/tickets/:id |
|
The placeholders in the URLs (:project_id and :id) are what we get as part
of our params when we request these URLs. When we request http://localhost:3000/projects/1/tickets/2,
our placeholders have the values of 1 and 2, so params will include the following:
{ project_id: 1, id: 2 }We can use the provided :project_id value to load up the right Project instance
in a before_action, like we did for certain actions in our ProjectsController.
Unlike the ProjectsController though, this before_action will be run before
every action, because the project will always be present; and it will use
params[:project_id], instead of params[:id]
Add the following line under the class definition in app/controllers/tickets_controller.rb:
before_action :set_projectAnd now under the new action, you can define this set_project method that
will use the params[:project_id] variable to load the @project variable.
private
def set_project
@project = Project.find(params[:project_id])
endNow our @project variable is defined. What about a tickets method? Is that
the next thing we need to define? Re-run the test with bundle exec rspec
spec/features/creating_tickets_spec.rb to see:
1) Users can create new tickets with valid attributes
Failure/Error: click_link "New Ticket"
NoMethodError:
undefined method `tickets' for #<Project:0x007f26fa162628>
It is the next thing we need to define. We’ll define tickets to be an
association on our Project model - a link between the two models, so we can
call @project.tickets and get an array of all of the Ticket instances that
are part of the @project. Seems magical. Let’s look at how it works.
Defining a has_many association
The tickets method on Project objects is defined by calling an association method
in the Project class called has_many, add this as follows in app/models/project.rb:
class Project < ActiveRecord::Base
has_many :tickets
...As mentioned before, this defines the tickets method you need as well, as the
association. With the has_many method called in the Project model, you can
now get to all the tickets for any given project by calling the tickets
method on any Project object.
By defining a has_many association in the model, it also gives you a whole
slew of other useful methods[2],
such as the build method, which you’re also
currently calling in the new action of TicketsController. The build
method is equivalent to new for the Ticket class (which you create in a
moment) but associates the new object instantly with the @project object by
setting a foreign key called project_id automatically.
Upon rerunning bundle exec rspec
spec/features/creating_tickets_spec.rb, you’ll get this:
1) Users can create new tickets with valid attributes
Failure/Error: click_link "New Ticket"
NameError:
uninitialized constant Project::Ticket
You can determine from this output that the method is looking for the Ticket
class, but why? The tickets method on Project objects is defined by the
has_many call in the Project model. This method assumes that when you want
to get the tickets, you actually want instances of the Ticket model. This
model is currently missing; hence, the error. You can add this model now with
the following command:
$ rails g model ticket name description:text project:references
The project:references part defines an integer column for the tickets
table called project_id.
It also defines an index on this column so that lookups for the tickets for a specific project will be faster. The new migration for this model looks like this:
class CreateTickets < ActiveRecord::Migration[7.0]
  def change
    create_table :tickets do |t|
      t.string :name
      t.text :description
      t.references :project, null: false, foreign_key: true

      t.timestamps
    end
  end
end
The project_id column represents the project to which this ticket links and
is called a foreign key. The purpose of this field is to
store the primary key of the project the ticket relates to. By creating a
ticket on the project with the id field of 1, the project_id field in the
tickets table will also be set to 1.
The foreign_key: true part of the command enforces database-level foreign key restrictions
for those platforms that support it, such as PostgreSQL. You can read more about the specifics of
Rails foreign key support at:
http://guides.rubyonrails.org/4_2_release_notes.html#foreign-key-support. The
SQLite driver we’re using doesn’t support foreign keys like this, so we don’t get
any benefit from specifying them, but nor does it do any harm. We’ll also be
looking at using PostgreSQL when we cover a different data during the Deployment chapter, Chapter 13.
Run the migration with rails db:migrate.
The db:migrate task runs the migrations and then dumps the
structure of the database to a file called db/schema.rb. This structure
allows you to restore your database using the rails db:schema:load
task
if you wish, which is better than running all the migrations on a large
project again![3]
Now when you run bundle exec rspec spec/features/creating_tickets_spec.rb,
you’re told the new template is missing:
1) Users can create new tickets with valid attributes
   Failure/Error: click_link "New Ticket"
   TicketsController#new is missing a template for request formats: text/html
You must create this file in order to continue.
Creating tickets in a project
Create the file at app/views/tickets/new.html.erb, and put the following
in it:
<header>
  <h1>
    <%= link_to @project.name, @project %>
  </h1>
  <h2>
    New Ticket
  </h2>
</header>

<%= render "form", project: @project, ticket: @ticket %>
Like we did with projects, this template will render a form partial (so we can
reuse it for the edit page when we get to it). The partial also goes in the
app/views/tickets folder. Create a new file called _form.html.erb, using this code:
<%= form_with(model: [project, ticket]) do |form| %>
  <% if ticket.errors.any? %>
    <div id="error_explanation">
      <h2><%= pluralize(ticket.errors.count, "error") %>
      prohibited this project from being saved:</h2>

      <ul>
        <% ticket.errors.full_messages.each do |msg| %>
          <li><%= msg %></li>
        <% end %>
      </ul>
    </div>
  <% end %>
  <div>
    <%= form.label :name %>
    <%= form.text_field :name %>
  </div>
  <div>
    <%= form.label :description %>
    <%= form.text_area :description %>
  </div>
  <%= form.submit %>
<% end %>
Note that form_with is passed an array of objects rather than:
<%= form_with(model: @ticket) do |f| %>This code indicates to form_with that you want the form to post to a nested
route. For the new action, this generates a route like
/projects/1/tickets and for the edit action, it generates a route like
/projects/1/tickets/2. This type of routing is known as polymorphic
routing.[4]
When you run bundle exec rspec spec/features/creating_tickets_spec.rb again,
you’re told the create action is missing:
1) Users can create new tickets with valid attributes
   Failure/Error: click_button "Create Ticket"
   AbstractController::ActionNotFound:
     The action 'create' could not be found for TicketsController
To define this action, put it directly under the new action in TicketsController but before the
private method. Also add the appropriate strong parameters
helper method right below private, as shown in the
following listing.
create action from TicketsController
def create
  @ticket = @project.tickets.build(ticket_params)

  if @ticket.save
    flash[:notice] = "Ticket has been created."
    redirect_to [@project, @ticket]
  else
    flash.now[:alert] = "Ticket has not been created."
    render :new, status: :unprocessable_entity
  end
end

private

def ticket_params
  params.require(:ticket).permit(:name, :description)
end
In this action, you use redirect_to and specify an Array—the same array
you used in form_with earlier—containing a Project object and a Ticket
object. Rails inspects any array passed to helpers, such as redirect_to and
link_to, and determines what you mean from the values. For this particular
case, Rails figures out that you want this helper:
project_ticket_path(@project, @ticket)Rails determines this helper because, at this stage, @project and @ticket
are both objects that exist in the database, and you can therefore route to
them. The route generated would be /projects/1/tickets/2 or something similar.
Back in the form_with, @ticket was new, so the route happened to be
/projects/1/tickets. You could have been explicit and specifically used
project_ticket_path in the action, but using an array is less repetitive.
When you run bundle exec rspec spec/features/creating_tickets_spec.rb, both
scenarios continue report the same error:
1) Users can create new tickets with valid attributes
   Failure/Error: click_button "Create Ticket"
   AbstractController::ActionNotFound:
     The action 'show' could not be found for TicketsController
Therefore, you must create a show action for
the TicketsController. But when you do so, you’ll need to find
tickets only for the given project.
Finding tickets scoped by project
Currently, both of your scenarios are failing due to a missing action. The next
logical step is to define the show action for your controller, which will look
up a given ticket by ID. But, being quick to learn and spot trends, you can
anticipate that you’ll also need to find a ticket by ID for the edit, update,
and destroy actions, and pre-empt similar errors when it comes to building
those actions. You can make this a before_action, as you did in the
ProjectsController with the set_project method. You define this finder
under the set_project method in the TicketsController:
def set_ticket
  @ticket = @project.tickets.find(params[:id])
end
find is yet another association
method provided by Rails when you declared that your Project model has_many
:tickets. This code attempts to find tickets only within the collection of
tickets owned by the specified project. Put your new before_action at the
top of your class, under the action to find the project:
before_action :set_project
before_action :set_ticket, only: %i(show edit update destroy)The sequence here is important because you want to find the @project before
you go looking for tickets for it. Then you can create the action that your
test is asking for, below the create method (but above private) in your
TicketsController:
show action in app/controllers/tickets_controller.rbdef show
endAgain, it doesn’t need to have anything in it - we’ve already loaded all of the
content the action needs, in our before_action calls. But it’s good to know it’s
there. Then create the view template for this
action at app/views/tickets/show.html.erb, using this code:
<header>
<h1><%= link_to @project.name, @project %></h1>
</header>
<header>
<h2><%= @ticket.name %></h2>
</header>
<%= simple_format(@ticket.description) %>The new method, simple_format, converts the line
breaks[5] entered into the
description field into HTML break tags (<br>) so that the description
renders exactly how the user intends it to.
Based solely on the changes you’ve made so far, your first scenario should be
passing. Let’s see with a quick run of bundle exec rspec
spec/features/creating_tickets_spec.rb:
1) Users can create new tickets when providing invalid attributes
Failure/Error: expect(page).to have_content "Ticket has not been
created."
expected to find text "Ticket has not been created." in "Ticket has been created.\nInternet Explorer"
...
2 examples, 1 failure
This means you’ve got the first scenario under control, and users of your
application can create tickets within a project. Next, you need to add
validations to the Ticket model to get the second scenario to pass.
Ticket validations
The second scenario fails because the @ticket
that it saves isn’t valid, at least according to your tests in their current state:
expected to find text "Ticket has not been created." in "Ticketee ...
You need to ensure that when somebody enters a ticket into the application,
the name and description attributes are filled in. To do this, define the
following validations in the Ticket model.
validates :name, presence: true
validates :description, presence: true|
Validating two fields using one line
You could also validate the presence of both of these fields using a single line: However, it is easier to see the associations for a given field if they are all in one place. If you were to add, for example, an extra length validation to the description field, it might look like this: And it would not be immediately obvious that both validations apply to one
field (the So it’s our preference to have validations for different fields on individual lines. You don’t have to use two lines to do it; we can still be friends. |
Now, when you run bundle exec spec/features/creating_tickets_spec.rb, the
entire feature passes:
2 examples, 0 failures
Before we wrap up here, let’s add one more scenario to ensure that what is
entered into the "Description" field is longer than 10 characters. You want the
descriptions to be useful! Add this scenario to the
spec/features/creating_tickets_spec.rb file:
scenario "with an invalid description" do
fill_in "Name", with: "Non-standards compliance"
fill_in "Description", with: "It sucks"
click_button "Create Ticket"
expect(page).to have_content "Ticket has not been created."
expect(page).to have_content "Description is too short"
endTo implement the code needed to make this scenario pass, add another
option to the end of the validation for the description in your
Ticket model, like this:
validates :description, presence: true, length: { minimum: 10 }By default, this will generate a message identical to the one we’ve used
in our test. You can verify this with the console - if you run
rails console and try to create a new Ticket object by using create!,
you can get the full text for your error:
irb(main):001:0> Ticket.create! ActiveRecord::RecordInvalid: ... Description is too short (minimum is 10 characters)
If you’re getting that error message on the console, that means it will appear
like that in the app too. Find out by running bundle exec rspec
spec/features/creating_tickets_spec.rb again:
3 examples, 0 failures
That one’s passing now. Excellent! You should ensure that the rest of the
project still works by running bundle exec rspec again. You’ll see this output:
13 examples, 0 failures, 3 pending
There are three pending specs here: one located in
spec/helpers/tickets_helper_spec.rb, one in spec/requests/tickets_spec.rb and the other in
spec/models/ticket_spec.rb. These were automatically generated when you ran
the commands to generate your TicketsController and Ticket model - you
don’t need them right now, so you can just delete these three files. When you’ve
done that, rerunning bundle exec rspec outputs a lovely green result:
10 examples, 0 failures
Great! Everything’s still working. Commit and push the changes!
$ git add . $ git commit -m "Implement creating tickets for a project" $ git push
This section covered how to create tickets and link them to a specific
project through the foreign key called project_id on records in
the tickets table. The next section shows how easily you can list tickets for individual
projects.
Viewing tickets
Now that you have the ability to create tickets, you’ll use the show action
of the TicketsController to view them individually. When displaying a list
of projects, you use the index action of the ProjectsController. For
tickets, however, we’ll list them them as part of showing the details of a
project, on the show action of the ProjectsController. This page currently isn’t
being used for anything else in particular, but also it just makes sense to see
the project’s tickets when you view the project. To test it, put a new feature at
spec/features/viewing_tickets_spec.rb using the code from the following
listing.
require "rails_helper"
RSpec.feature "Users can view tickets" do
before do
vscode = FactoryBot.create(:project, name: "Visual Studio Code")
FactoryBot.create(:ticket, project: vscode,
name: "Make it shiny!",
description: "Gradients! Starbursts! Oh my!")
ie = FactoryBot.create(:project, name: "Internet Explorer")
FactoryBot.create(:ticket, project: ie,
name: "Standards compliance", description: "Isn't a joke.")
visit "/"
end
scenario "for a given project" do
click_link "Visual Studio Code"
expect(page).to have_content "Make it shiny!"
expect(page).to_not have_content "Standards compliance"
click_link "Make it shiny!"
within(".ticket h2") do
expect(page).to have_content "Make it shiny!"
end
expect(page).to have_content "Gradients! Starbursts! Oh my!"
end
endQuite the long feature! It covers a couple of things - both viewing the list
of tickets for a project, and then viewing the details for a specific
ticket.[6]
We’ll go through it piece by piece in a moment. First,
let’s examine the within usage in the scenario. Rather than checking the
entire page for content, this step checks the specific element using Cascading
Style Sheets (CSS) selectors. The .ticket h2 selector finds all h2 elements
within a div with the class attribute set to ticket, and then we make sure the content is
visible within one of those elements.[7]
This content should appear in the specified tag only when you’re on the ticket
page, so this is a great way to make sure you’re on the right page and that
the page is displaying relevant information.
When you run this spec with bundle exec rspec spec/features/viewing_tickets_spec.rb,
you’ll see that it can’t find the ticket factory:
Failure/Error:
FactoryBot.create(:ticket, project: vscode,
name: "Make it shiny!",
description: "Gradients! Starbursts! Oh my!")
KeyError:
Factory not registered: "ticket"
Just as before, when the project factory wasn’t registered, you need to create
the ticket factory now. It should create an example ticket with a valid name
and description. To do this, create a new file called
spec/factories/ticket.rb with the following content.
FactoryBot.define do
factory :ticket do
name { "Example ticket" }
description { "An example ticket, nothing more" }
end
endWith the ticket factory defined, the before block of this spec should now
run all the way through when you run bundle exec rspec
spec/features/viewing_tickets_spec.rb. You’ll see this error:
1) Users can view tickets for a given project
Failure/Error: expect(page).to have_content "Make it shiny!"
expected to find text "Make it shiny!" in "Visual Studio Code\nEdit Project Delete Project\nTickets\nNew Ticket"
The spec is attempting to see the ticket’s name on the page. But it can’t see
it at the moment, because you’re not displaying a list of tickets on the
project show template yet.
Listing tickets
To display a ticket on the show template, you can iterate through the
project’s tickets by using the tickets method on a Project object, made
available by the has_many :tickets call in your model. Put this code at the
bottom of app/views/projects/show.html.erb.
<ul>
<% @project.tickets.each do |ticket| %>
<li>
#<%= ticket.id %> -
<%= link_to ticket.name, [@project, ticket] %>
</li>
<% end %>
</ul>|
Be careful when using
link_to.If you use a |
Here you iterate over the items in @project.tickets using the each method,
which does the iterating for you, assigning each item to a ticket variable
used in the block. The code in this block runs for every ticket. When you run
bundle exec rspec spec/features/viewing_tickets_spec.rb, it passes because the app
now has the means to go to a specific ticket from the project’s page:
1 example, 0 failures
Time to make sure everything else is still working by running
bundle exec rspec. You should see all green:
11 examples, 0 failures
Fantastic! Push!
$ git add . $ git commit -m "Implement tickets display" $ git push
You can see tickets for a particular project, but what happens when a project
is deleted? The tickets for that project aren’t magically deleted. To
implement this behavior, you can pass some options to the has_many
association, which will delete the tickets when a project is deleted.
Culling tickets
When a project is deleted, its tickets become useless: they’re inaccessible
because of how you defined their routes. Therefore, when you delete a project,
you should also delete the tickets for that project. You can do that by using
the :dependent option on the has_many association for tickets defined in
your Project model.
This option has five choices that all act slightly differently. The first
one is the :destroy value:
has_many :tickets, dependent: :destroyIf you put this in your Project model, any time you call destroy on a
Project object, Rails will iterate through the tickets for this project,
and call destroy on each of them in turn (as well as any other destroy-related
callbacks on the project itself). In turn, each ticket object will have any
destroy-related callbacks called on it, and if it has any has_many
associations with the dependent: :destroy option set, then those objects
will be destroyed, and so on. The problem is that if you have a
large number of tickets, destroy is called on each one, which will be slow.
The solution is the second value for this option:
has_many :tickets, dependent: :delete_allThis deletes all the tickets using a SQL delete, like this:
DELETE FROM tickets WHERE project_id = :project_idThis operation is quick and is exceptionally useful if you have a large number
of tickets that don’t have callbacks or that have callbacks you don’t
necessarily care about when deleting a project. If you do have callbacks on
Ticket for a destroy operation, then you should use the first option,
dependent: :destroy.
Thirdly, if you want to disassociate tickets from a project and unset the
project_id field, you can use this option:
has_many :tickets, dependent: :nullifyWhen a project is deleted with this type of :dependent option defined, it will execute an SQL query such as this:
UPDATE tickets SET project_id = NULL WHERE project_id = :project_idRather than deleting the tickets, this option keeps them around; but their
project_id fields are unset, leaving them orphaned, which isn’t suitable for
this system.
Using this option would be helpful, for example, if you were building a task-
tracking application and instead of projects and tickets, you had users and
tasks. If you deleted a user, you might want to unassign rather than delete
the tasks associated with that user, in which case you’d use the dependent:
:nullify option instead.
Finally, you have two options that work similarly - :restrict_with_error and
:restrict_with_exception. These options will both prevent
records from being deleted if the association isn’t empty - for example, in
our projects and tickets scenario we wouldn’t be able to delete projects if
they had any tickets in them.
If we were using :restrict_with_error then calling @project.destroy on a
project with tickets would add a validation error to the @project instance,
as well as returning false. Using :restrict_with_exception in this case
would raise an exception that our application would have to manually catch
and handle, or else the user would receive a HTTP response of 500 - Internal
Server Error. An example of where this could be useful is in a billing scenario: it wouldn’t
be good for business if users were able to cancel/delete their own accounts in
your system, if they had associated bills that still required payment.
In our projects and tickets scenario, though, you would use dependent: :destroy
if you have callbacks to run on tickets when they’re destroyed or dependent:
:delete_all if you have no callbacks on tickets. To ensure that all tickets
are deleted on a project when the project is deleted, change the has_many
association in your Project model to this:
has_many :tickets, dependent: :delete_allWith this new :dependent option in the Project model, all tickets for the
project will be deleted when the project is deleted.
You aren’t writing any tests for this behavior, because it’s simple and you’d
basically be testing that you changed one tiny option. This is more of an
internal implementation detail than it is customer-facing, and you’re writing
feature tests right now, not model tests. Let’s check that you didn’t
break existing tests by running bundle exec rspec:
10 examples, 0 failures
Good! Let’s commit:
$ git add .
$ git commit -m "Cull tickets when project gets destroyed"
$ git push
Next, let’s look at how to edit the tickets in your application.
Editing tickets
You want users to be able to edit tickets, the updating part of this CRUD
interface for tickets. This section covers creating the edit and update
actions for the TicketsController. This functionality follows a thread
similar to the projects edit feature, where you follow an "Edit" link in the
show template, change a field, and then click an update button and expect to
see two things: a message indicating that the ticket was updated successfully,
and the modified data for that ticket.
As always, we’ll start with the test that covers the functionality we wish we had. Then we’ll write the code that will make the test pass.
The "Editing tickets" spec
Just as you made a spec for creating a ticket, you need one for editing and updating existing tickets. Specs testing update functionality are always a little more complex than specs for testing create functionality, because you need to have an existing object that’s built properly before the test, and then you can change it during the test.
With that in mind, you can write this feature using the code in the
following listing. Put the code in a file at
spec/features/editing_tickets_spec.rb.
require "rails_helper"

RSpec.feature "Users can edit existing tickets" do
  let(:project) { FactoryBot.create(:project) }
  let(:ticket)  { FactoryBot.create(:ticket, project: project) }

  before do
    visit project_ticket_path(project, ticket)
  end

  scenario "with valid attributes" do
    click_link "Edit Ticket"
    fill_in "Name", with: "Make it really shiny!"
    click_button "Update Ticket"

    expect(page).to have_content "Ticket has been updated."

    within(".ticket h2") do
      expect(page).to have_content "Make it really shiny!"
      expect(page).not_to have_content ticket.name
    end
  end

  scenario "with invalid attributes" do
    click_link "Edit Ticket"
    fill_in "Name", with: ""
    click_button "Update Ticket"

    expect(page).to have_content "Ticket has not been updated."
  end
end
At the top of this feature, you use a new RSpec method called let. In fact,
you use it twice. It defines a new method with the same name as the symbol passed
in, and that new method then evaluates (and caches) the content of the block whenever that
method is called. It’s also lazy-loaded - the block won’t get evaluated until
the first time you call the method denoted by the symbol, eg. project or ticket in this case.
It also has a bigger brother, called let! (with a bang!) let! isn’t lazy-loaded - when
you define a method with let! it will be evaluated immediately, before your tests
start running.
For a concrete example, if we had a test that looked like the following:
let and let!
RSpec.describe "A sample test" do
  let!(:project) { FactoryBot.create(:project) }
  let(:ticket)   { FactoryBot.create(:ticket) }

  it "lazily loads `let` methods" do
    puts Project.count
    puts Ticket.count

    puts ticket.name
    puts Ticket.count
  end
end
If you were to run it, what do you think it might output? If you guessed the following:
-
Project.count→ 1 (asprojectis already evaluated) -
Ticket.count→ 0 (tickethas not been evaluated yet) -
ticket.name→ "Example ticket" (from our factory) -
Ticket.count→ 1 (tickethas now been evaluated and exists in the database)
You’re right!
In our case, it makes no difference if we use let or let!. The first
thing we’re doing in the before block is instantiating both project and
ticket by visiting the ticket’s show page. If, however, we were visiting the
homepage and then navigating to the ticket’s page, it wouldn’t work - the ticket
would never be created.
After we visit the ticket’s show page, then we click the "Edit" link, make
some changes, and verify that those changes get persisted. We’re also testing
the failure case - what happens if we can’t update a ticket
for some reason. It looks pretty similar to the update case, but rather than try
to factor out all the commonalities, you
repeat yourself. Some duplication in tests is OK; if it makes the test easier
to follow, it’s worth a little repetition.
When you run this feature using bundle exec rspec
spec/features/editing_tickets_spec.rb, the first three lines in the before
run fine, but the fourth fails:
1) Users can edit existing tickets with valid attributes
   Failure/Error: click_link "Edit Ticket"
   Capybara::ElementNotFound:
     Unable to find link "Edit Ticket"
To fix this, add the "Edit Ticket" link to the show template of the
TicketsController, because that’s the page you’ve visited in the feature.
It sounds like an action link for the ticket, so we can add a list of action
links into the header that specifies the ticket’s name.
<header>
  <h2><%= @ticket.name %></h2>

  <li><%= link_to "Edit Ticket", [:edit, @project, @ticket] %></li>
</header>
Here is yet another use of the Array argument passed to the link_to
method, but rather than passing just Active Record objects, you pass a Symbol
first. Rails, yet again, works out from the Array what route you wish to
follow. Rails interprets this array to mean the edit_project_ticket_path
method, which is called like this:
edit_project_ticket_path(@project, @ticket)Now that you have an "Edit Ticket" link, you need to add the edit action to
the TicketsController, because that will be the next thing to error when you
run bundle exec rspec spec/features/editing_tickets_spec.rb:
1) Users can edit existing tickets with valid attributes
   Failure/Error: click_link "Edit Ticket"
   AbstractController::ActionNotFound:
     The action 'edit' could not be found for TicketsController
  ...
2 examples, 2 failures
Adding the edit action
The next logical step is to define the edit action in your
TicketsController. Like the edit action in ProjectsController, it doesn’t
technically need to exist because it will be empty - all it needs to do is load
the @project and @ticket variables, which are already done via set_project
and set_ticket. But it’s good practice to define it, so add it in under the
show action in TicketsController, but before the private call.
def edit
end
The next logical step is to create the view for this action. Put it at
app/views/tickets/edit.html.erb, and fill it with this content:
<header>
  <h1>
    Edit Ticket
    <small><%= @project.name %></small>
  </h1>
</header>

<%= render "form", project: @project, ticket: @ticket %>
Here you reuse the form partial you created for the new action, which is
handy. The form_with knows which action to go to. If you run the feature spec
again with bundle exec rspec spec/features/editing_tickets_spec.rb, you’re told the
update action is missing:
1) Users can edit existing tickets with valid attributes
   Failure/Error: click_button "Update Ticket"
   AbstractController::ActionNotFound:
     The action 'update' could not be found for TicketsController
Adding the update action
You should now define the update action in your TicketsController, as shown in the following listing.
update action of TicketsController
def update
  if @ticket.update(ticket_params)
    flash[:notice] = "Ticket has been updated."
    redirect_to [@project, @ticket]
  else
    flash.now[:alert] = "Ticket has not been updated."
    render :edit,
  end
end
Remember that in this action you don’t have to find the @ticket or
@project objects, because a before_action does it for the show, edit,
update, and destroy actions. With this single action implemented, both
scenarios in the "Editing Tickets" feature will now pass when you run bundle exec
rspec spec/features/editing_tickets_spec.rb:
2 examples, 0 failures
Check to see if everything works with a quick run of bundle exec rspec:
13 examples, 0 failures
Great! Let’s commit and push that:
$ git add .
$ git commit -m "Tickets can now be edited"
$ git push
In this section, you implemented edit and update for the
TicketsController by using the scoped finders and some familiar methods,
such as update. You’ve got one more part to go: deletion.
Deleting tickets
We now reach the final story for this nested resource, deleting tickets. As
with some of the other actions in this chapter, this story doesn’t differ from
what you used in the ProjectsController, except you’ll change the name
project to ticket for your variables and flash[:notice]. It’s good to
have the reinforcement of the techniques previously used: practice makes
perfect.
Use the code from the next listing to write a new feature in
spec/features/deleting_tickets_spec.rb.
require "rails_helper"

RSpec.feature "Users can delete tickets" do
  let(:project) { FactoryBot.create(:project) }
  let(:ticket)  { FactoryBot.create(:ticket, project: project) }

  before do
    visit project_ticket_path(project, ticket)
  end

  scenario "successfully" do
    click_button "Delete Ticket"

    expect(page).to have_content "Ticket has been deleted."
    expect(page.current_url).to eq project_url(project)
    expect(page).not_to have_content(ticket.name)
  end
end
When you run this spec using bundle exec rspec
spec/features/deleting_tickets_spec.rb, it will fail because you don’t yet have a
"Delete Ticket" link on the show template for tickets:
1) Users can delete tickets successfully
   Failure/Error: click_button "Delete Ticket"
   Capybara::ElementNotFound:
     Unable to find button "Delete Ticket"
You can add the "Delete Ticket" button to the list of actions on
app/views/tickets/show.html.erb, right after the "Edit Ticket" link.
<%= button_to "Delete Ticket", [@project, @ticket], method: :delete,
  form: {
    data: { turbo_confirm: "Are you sure you want to delete this ticket?"}
  }
%>
The method: :delete is specified again, turning the request into one headed
for the destroy action in the controller. Upon running bundle exec rspec spec/features/deleting_tickets_spec.rb
again, you’re told a destroy action is missing:
1) Users can delete tickets successfully
   Failure/Error: click_button "Delete Ticket"
   AbstractController::ActionNotFound:
     The action 'destroy' could not be found for TicketsController
The next step must be to define this action, right? Open
app/controllers/tickets_controller.rb, and define it directly under the
update action.
destroy action from TicketsController
def destroy
  @ticket.destroy
  flash[:notice] = "Ticket has been deleted."

  redirect_to @project
end
After you delete the ticket, you redirect the user back to the show page for
the project the ticket belonged to. With that done, your feature should now pass
when you run bundle exec rspec spec/features/deleting_tickets_spec.rb again:
1 example, 0 failures
Yet again, check to see that everything is still going as well as it should by
using bundle exec rspec. You haven’t changed much, so it’s likely that things are
still working. You should see this output:
14 examples, 0 failures
Commit and push!
$ git add .
$ git commit -m "Implement deleting tickets feature"
$ git push
git
You’ve now completely created another CRUD interface, this time for the
tickets resource, which is only accessible within the scope of a project.
This means you must request it using a URL such as /projects/1/tickets/2
rather than /tickets/2.
Summary
In this chapter, you generated another controller, the TicketsController,
which allows you to create records for your Ticket model that will end up in
your tickets table. The difference between this controller and the
ProjectsController is that the TicketsController is accessible only within
the scope of an existing project, because you used nested routing.
In this controller, you scoped the finds for the Ticket model by using the
tickets association method, provided by the association helper method
has_many call in your Project model. has_many also provides the build
method, which you used to begin creating new Ticket records that are scoped
to a project.
In the next chapter, you’ll learn how to let users sign up and sign in to your application. You’ll also implement a basic authorization for actions such as creating a project.