Ruby on Rails, the framework
Welcome aboard! It’s great to have you with us on this journey through the world of Ruby on Rails. Ruby on Rails is known as a powerful web framework that helps developers rapidly build modern web applications. In particular, it provides lots of niceties to help you in your quest to develop a full-featured real-world application and be happy doing it. Happy developers are great developers!
If you’re wondering who uses Rails, there are plenty of companies that do: Twitter, Netflix, and Urban Dictionary, just to name a few. This book will teach you how to build a very small and simple application in this first chapter, right after we go through a brief description of what Ruby on Rails actually is. Within the first couple of chapters, you’ll have some solid foundations of an application, and you’ll build on those throughout the rest of the book.
Ruby on Rails overview
Ruby on Rails is a framework built on the Ruby language—hence the name Ruby on Rails. The Ruby language was created back in 1993 by Yukihiro "Matz" Matsumoto of Japan, and was released to the general public in 1995. Since then, it has earned both a reputation and an enthusiastic following for its clean design, elegant syntax, and wide selection of tools available in the standard library and via a package-management system called RubyGems. It also has a worldwide community and many active contributors constantly improving the language and the ecosystem around it. We’re not going to go into great depth about the Ruby language in this book though, because we’d rather talk about Ruby on Rails[1].
The foundation for Ruby on Rails was created during 2004 when David Heinemeier Hansson was developing an application called Basecamp. For his next project, the foundational code used for Basecamp was abstracted out into what we know as Ruby on Rails today. This project was released under a software license called the MIT License[2], and this permits anyone anywhere to use Ruby on Rails.
Since then, Ruby on Rails has quickly progressed to become one of the leading web development frameworks. This is in no small part due to the large community surrounding it, improving everything from documentation, to bug fixes, all the way up to adding new features to the framework.
This book is written for version 7.0 of the framework, which is the latest version of Rails. If you’ve used Rails 4 or Rails 5, you’ll find that much feels the same, yet Rails has learned some new tricks, as well.[3]
Benefits
Ruby on Rails allows for rapid development of applications by using a concept known as convention over configuration. A new Ruby on Rails application is created by running the application generator, which creates a standard directory structure and the files that act as a base for every Ruby on Rails application. These files and directories provide categorization for pieces of your code, such as the app/models directory for containing files that interact with the database and the app/assets directory for assets such as stylesheets, JavaScript files, and images. Because all this is already there, you won’t be spending your time configuring the way your application is laid out. It’s done for you.
One great example of rapid development of a Rails application is the 35-minute Rails tour video recorded by David Heinemeier Hansson.[4] This screencast takes you from having nothing at all to having a basic blogging and commenting system, in a little over half an hour.
Once learned, Ruby on Rails affords you a level of productivity unheard of in other web frameworks, because every Ruby on Rails application starts out the same way - with exactly the same layout. The similarity between the applications is so close that the paradigm shift between different Rails applications isn’t tremendous. If and when you jump between Rails applications, you don’t have to relearn how it all connects together - it’s mostly the same.
The Rails ecosystem may seem daunting at first, but Rails conventions allow even new things to seem familiar very quickly, smoothing the learning curve substantially.
Ruby Gems
The core features of Rails are split up into many different libraries, such as Active Record, Active Storage, Active Job, Active Support, Action Mailer, and Action Pack. These are called Ruby Gems, or gems for short.[5] These gems provide a wide range of methods and classes that help you develop your applications. They eliminate the need for you to perform boring, repetitive tasks—such as coding how your application hooks into your database — and let you get right down to writing valuable code for whatever it is you want to do.
Ever wished for a built-in way of automatically making sure your code works? The Ruby gem ecosystem has a gem called RSpec. When you use RSpec, you’ll write automated test code for your application, as you’ll see many, many times throughout this book. This test code will make sure your code works continuously. Testing your code saves your bacon in the long term, and that’s a fantastic thing.
In addition to testing frameworks, the Ruby community has produced many high-quality gems for use in your day-to-day development with Ruby on Rails. Usually, if you can think of it, there’s a gem out there that will help you do it.
Noticing a common pattern yet? Probably. As you can see, Ruby on Rails (and the great community surrounding it) provides code that performs the trivial application tasks for you, from setting up the foundations of your application to handling the delivery of email. The time you save with all these libraries is immense! And because the code is open source, you don’t have to go to a specific vendor to get support. Anyone who knows Ruby will help you if you’re stuck. Just ask! We’re a friendly bunch.
MVC
One of the other benefits of Rails is its adherence to a pattern called MVC, or Model-View-Controller.
The Model-View-Controller (MVC) pattern isn’t unique to Ruby on Rails, but provides much of the core foundation for a Ruby on Rails application. This pattern is designed to keep the different parts of the application separate while providing a way for data to flow between them.
In applications that don’t use MVC, the directory structure and how the
different parts connect to each other is commonly left up to the original
developer. Generally, this is a bad idea because different people have
different opinions about where things should go. In Rails, a specific
directory structure encourages developers to conform to the same layout,
putting all the major parts of the application inside an app directory.
This app directory has three main subdirectories: models, controllers, and
views.
-
Models contain the domain logic of your application. This logic dictates how the records in your database are retrieved, validated, or manipulated. In Rails applications, models define the code that interacts with the database’s tables to retrieve and set information in them. Domain logic also means things such as validations or particular actions to perform on the data.
-
Controllers interact with the models to gather information to send to the view. They’re the layer between the user and the database. They call methods on the model classes, which can return single objects representing rows in the database or collections (arrays) of these objects. Controllers then make these objects available to the view through instance variables. Controllers are also used for permission checking, such as ensuring that only users who have special permission to perform certain actions can perform those actions, and users without that permission can’t.
-
Views display the information gathered by the controller, by referencing the instance variables set there, in a developer-friendly manner. In Ruby on Rails, this display is done by default with a templating language known as Embedded Ruby (ERB). ERB allows you to embed Ruby (hence the name) into any kind of file you wish. This template is then preprocessed on the server side into the output that’s shown to the user.
Rails in the wild
One of the best-known sites that runs Ruby on Rails is GitHub, a hosting service for Git repositories. The site was launched in February 2008, and is now the leading Git web-hosting site. GitHub’s massive growth was in part due to the Ruby on Rails community quickly adopting it as their de facto repository hosting site. Now GitHub is home to over 200 million repositories[6] for just about every programming language on the planet. It’s not exclusive to programming languages, either; if it can go in a Git repository, it can go on GitHub. As a matter of fact, this book and its source code are kept on GitHub!
Other companies you might’ve heard of, like Airbnb, Stripe, Square and Twitter all use Rails too. It’s used by some pretty big players!
But you don’t have to build huge applications with Rails. There’s a Rails application that was built for the specific purpose of allowing people to review the previous edition of this book, and it’s just over 2,000 lines of code. This application allowed reviewers during the writing of the book to view the book’s chapters and leave notes on each element, leading overall to a better book.
Now that you know what other people have accomplished with Ruby on Rails, let’s dive into creating your own application.
Rails from first principles
This application that we will create now will give you a general overview of the main components of a Rails application. The components that we will cover will be the routes, controllers, models, and views.
This will be a simple application that you can use to track your purchases. We’ll end up with a page that looks like this:
This application will allow us to list, create, update, and delete from a list of purchases.
This application is relatively straightforward and so it’s perfect to give us our first taste of Rails.
Installing Rails
To get started, you must have these three things installed:
-
Ruby
-
RubyGems
-
Rails
If you’re on a UNIX-based system (Linux or Mac), we recommend that you use ruby-install [7] to install Ruby and RubyGems. For Windows, we recommend the RubyInstaller application[8]. There’s a complete installation guide for Ruby and Rails, on Mac OS X, Linux, and Windows, in Appendix A of this book.
Before proceeding, let’s check to be sure you have everything. Type these commands, and check out the responses:
$ ruby -v
ruby 3.1.1p18 (2022-02-18 revision 53f5fc4236) [x86_64-darwin20]
$ gem -v
3.3.16
$ rails -v
Rails 6.1.0
If you see something that looks close to this, you’re good to go! You might see [x86_64-linux] instead of [x86_64-darwin19], or a slightly different patch (p) number, but that’s okay. These particular values are the ones we’re using right now and we’ve tested everything in the book against them; as long as you have Ruby 3.1, Rails 7.0, and RubyGems 3.0, everything should be fine.
|
Make sure you’re setup!
If you don’t get these answers, or you get some sort of error message, please be sure to complete this setup before you try to move on; you can’t just ignore errors with this process! Certain gems (and Rails itself) only support particular versions of Ruby, so if you don’t get this right, things won’t work. |
Generating an application
Remember before how we said that every Rails application starts out with the same layout? Well, we’re about to see that for ourselves!
With Rails installed, to generate an application, you run the rails command and pass it the new argument and the name of the application you want to generate: things_i_bought. When you run this command, it creates a new directory called "things_i_bought", which is where all your application’s code will go.
|
Don’t use reserved words for application naming
You can call your application almost anything you wish, but it can’t be given a name that is a reserved word in Ruby or Rails. For example, you wouldn’t call your application When you use an invalid application name, you’ll see an error like one of these: $ rails new rails Invalid application name rails, constant Rails is already in use. Please choose another application name. $ rails new test Invalid application name test. Please give a name which does not match one of the reserved rails words. |
The application you’re going to generate will be able to record purchases you’ve made. You can generate it using this command:
$ rails new things_i_bought
The output from this command may seem a bit overwhelming at first, but rest assured, it’s for your own good. All the directories and files generated provide the building blocks for your application, and you’ll get to know each of them as we progress. For now, let’s get rolling and learn by doing, which is the best way.
Starting the application
To get the server running, you must first change into the newly created application’s directory, and then start the application server:
$ cd things_i_bought
$ rails server
rails server (or rails s, for short)
starts a web server on your local address on port 3000, using a Ruby web server called Puma. It will output this:app-name:
=> Booting Puma
=> Rails 6.1.0 application starting in development
=> Run `bin/rails server --help` for more startup options
...
* Listening on http://127.0.0.1:3000
* Listening on http://[::1]:3000
Use Ctrl-C to stop
This indicates that the server will be available on port 3000 on your local machine, and that you can stop the server by pressing Ctrl+C.
To connect to this server, go to http://localhost:3000 in your favorite browser.
You’ll see the Rails welcome page:
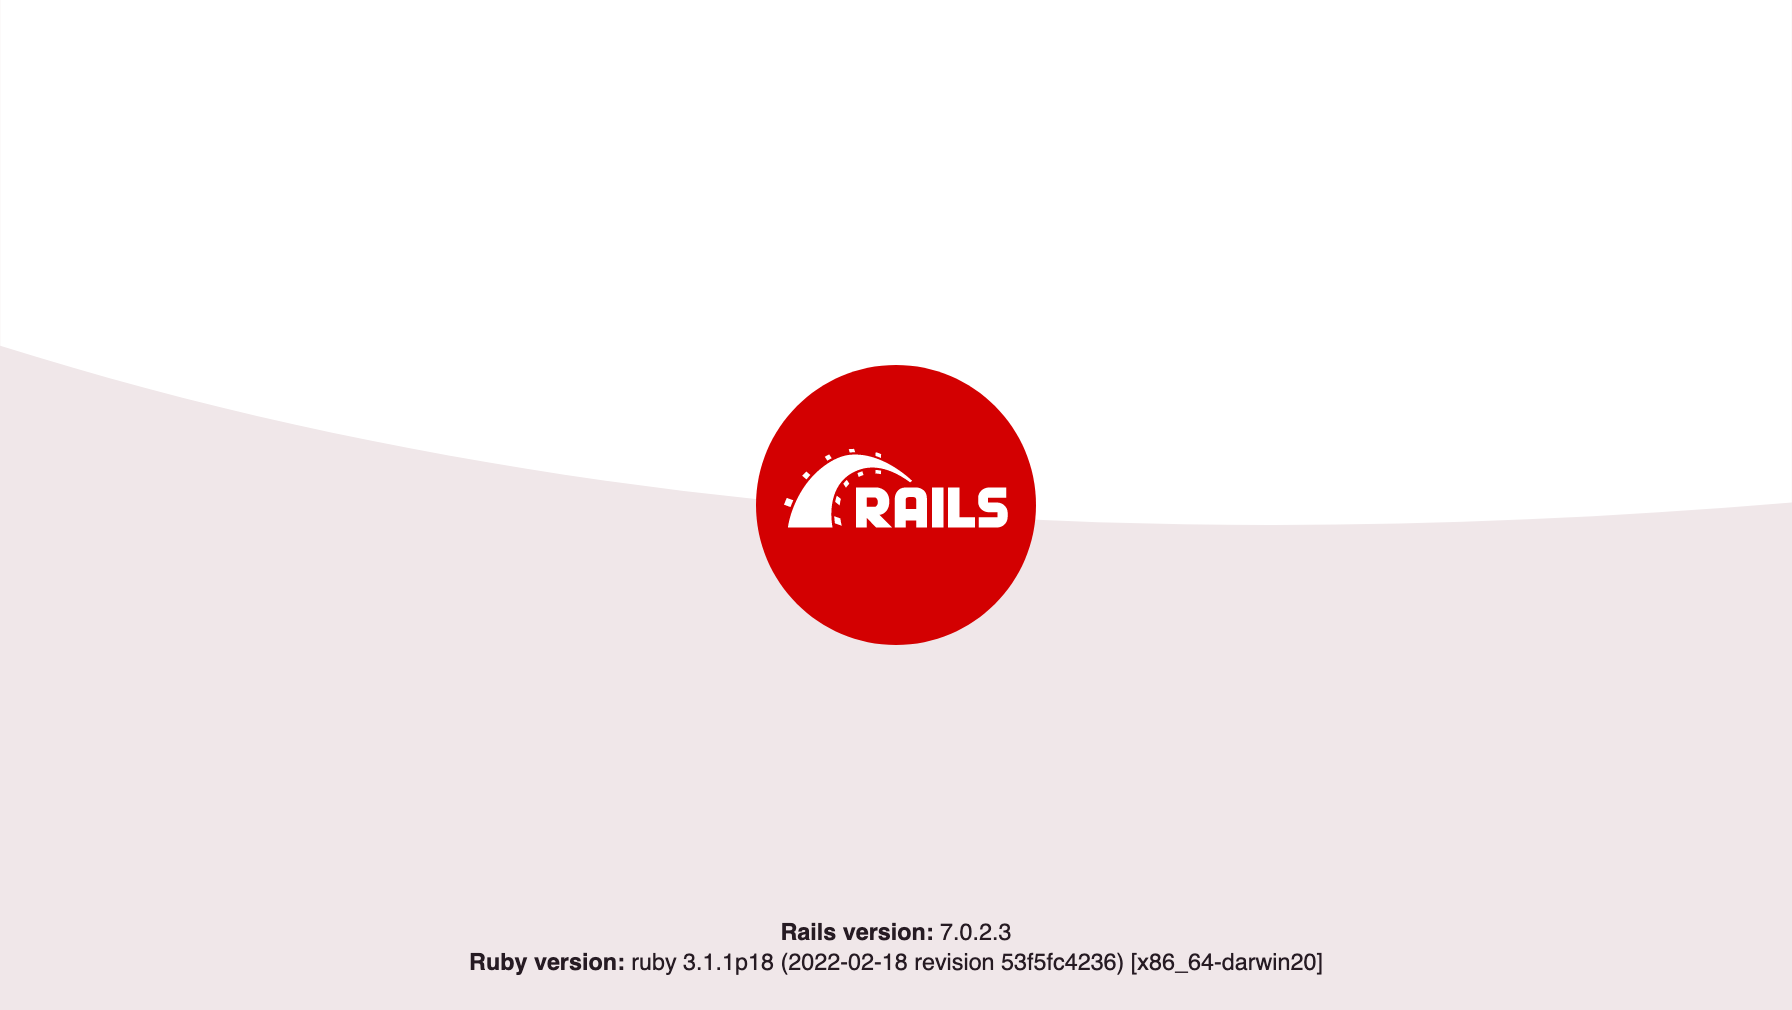
At the bottom of this page, you’ll see two things: the version of Rails, and the version of Ruby that you’re using. These should match the earlier version numbers that we mentioned earlier. That is, the Rails version should be 6.1.0 and the Ruby version should start with "Ruby 3.1.1".
Getting started with Rails
The rest of this chapter is going to be a walk through for the different pieces of a Rails application. We’re going to use a utility called the scaffold generator that will generate a lot of our code for us. After we’ve done that, we’ll walk through all the individual pieces that this generator provides.
This should give you a fairly good overview of the parts that a Rails application is comprised of.
Scaffolding
To get started with this Rails application, you can generate a scaffold. Scaffolds in Rails provide a lot of basic functionality and are generally used as temporary structures to get started, rather than for full-scale development. In this case, it’s a really good way to get started with exploring what Rails is capable of straight away.
Let’s generate a scaffold by running this command:
$ rails generate scaffold purchase name:string cost:decimal
You can also use rails g as a short-hand for rails generate.
|
This generator will generate quite a lot:
invoke  active_record
create    db/migrate/20220315223925_create_purchases.rb
create    app/models/purchase.rb
invoke    test_unit
create      test/models/purchase_test.rb
create      test/fixtures/purchases.yml
invoke  resource_route
  route    resources :purchases
invoke  scaffold_controller
create    app/controllers/purchases_controller.rb
invoke    erb
create      app/views/purchases
create      app/views/purchases/index.html.erb
create      app/views/purchases/edit.html.erb
create      app/views/purchases/show.html.erb
create      app/views/purchases/new.html.erb
create      app/views/purchases/_form.html.erb
create      app/views/purchases/_purchase.html.erb
invoke    resource_route
invoke    test_unit
create      test/controllers/purchases_controller_test.rb
invoke    helper
create      app/helpers/purchases_helper.rb
invoke      test_unit
When you used the rails command earlier,
it generated an entire Rails application. You can use this command inside an application to generate a specific part of the application by passing the generate argument to the rails command, followed by what it is you want to generate.
The scaffold command generates everything that we will need for creating, viewing, updating or deleting purchases within our application. We’ll walk through the individual pieces shortly, but first let’s talk about this command that was just used.
Everything after the name of the scaffold defines the fields for the database table, and the attributes for the objects of this scaffold. Here you tell Rails that the table for your purchase scaffold will contain name and cost fields, which are a string and a decimal, respectively. To create this table, the scaffold
generator generates what’s known as a migration. Let’s look at what migrations are.
Migrations
When we’re working within a Rails application, our data has to come from somewhere, and that somewhere is usually a database. In order to use this scaffold of ours properly, we’re going to need some data. And that data is going to need to come from a database table. But that table doesn’t exist yet! To create a database table to store our data in, we use what’s known as a migration.
Migrations provide a way to implement incremental changes to the database’s structure — the data within that structure comes later. Each migration is
timestamped right down to the second, which provides you (and anybody else developing the
application with you) an accurate timeline of your database’s evolution. Let’s open the only file in db/migrate now and see what it
does. Its contents are shown in the following listing.
class CreatePurchases < ActiveRecord::Migration[7.0]
  def change
    create_table :purchases do |t|
      t.string :name
      t.decimal :cost

      t.timestamps
    end
  end
end
Migrations are Ruby classes that inherit from ActiveRecord::Migration. Inside the class, one method is defined: the change method.
Inside the change method, you use database-agnostic commands to create a table. When we execute the code in this migration, it will create a table called purchases with a name column that’s a string, a cost column that’s a decimal, and two timestamp fields. These timestamp fields are called created_at and updated_at and are automatically set to the current time when a
record is created or updated, respectively. This feature is built into a part of Rails called Active Record. If there are fields present with these names (or created_on and
updated_on), they will be automatically updated when necessary.
Creating a purchases table
To run the migration and create the purchases table we can type this command into the console:
$ rails db:migrate
Because this is your first time running migrations in your Rails application, and because you’re using a SQLite3 database — the default database for Rails applications — Rails first creates the database in a new file at db/development.sqlite3 and then creates the purchases table inside it. When you run rails db:migrate, it doesn’t just run the change method from the latest migration but runs any migration that hasn’t yet been run, allowing you to run multiple migrations sequentially.
Rails keeps track of the last migration that was run by storing it using this line in the db/schema.rb file:
ActiveRecord::Schema.define(version: [timestamp]) doThere is also a database table called schema_migrations that stores a record with the same version number.
This version should match the prefix of the migration you just
created[9], and Rails uses this value
to know what migration it’s up to. The remaining content of this file shows the combined state of all the migrations to this point. This file can be used to restore the last known state of your database if you run the rails db:schema:load command.
With your database set up with a purchases table in it, let’s look at how you can add data to this table by using the scaffold that you’ve just created.
Viewing purchases
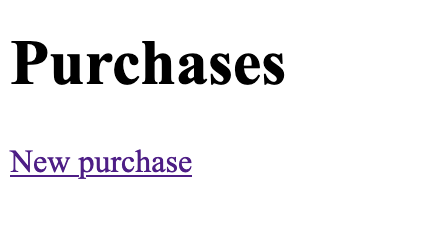
Ensure that your Rails server is still running, or start a new one by running rails s or rails server again. Start your browser now, and go to http://localhost:3000/purchases. You’ll see the scaffolded screen for
purchases:
Let’s take a look at how this page came to be. How is it that we’re able to go to http://localhost:3000/purchases and see something already? The answer to that lies in a file called config/routes.rb. The scaffold generator has added a line there:
Rails.application.routes.draw do
  resources :purchases
  # Define your application routes per the DSL in https://guides.rubyonrails.org/routing.html

  # Defines the root path route ("/")
  # root "articles#index"
end
This resources :purchases line is very simple, but it does quite a lot. This line generates routes for purchases actions that can be taken within this application. To see what those routes are, we can run this command:
$ rails routes
Here’s the output for all the purchases routes from that command in a tabular form (we’ll ignore all those other routes for now!):
| Prefix | Verb | URI Pattern | Controller#Action |
|---|---|---|---|
purchases |
GET |
/purchases |
purchases#index |
POST |
/purchases |
purchases#create |
|
new_purchase |
GET |
/purchases/new |
purchases#new |
edit_purchase |
GET |
/purchases/:id/edit |
purchases#edit |
purchase |
GET |
/purchases/:id |
purchases#show |
PATCH |
/purchases/:id |
purchases#update |
|
PUT |
/purchases/:id |
purchases#update |
|
DELETE |
/purchases/:id |
purchases#destroy |
This one line in the config/routes.rb file has provided us with eight different routes. The one that we care about for the page we’re looking at right now is the top route:
| Prefix | Verb | URI Pattern | Controller#Action |
|---|---|---|---|
purchases |
GET |
/purchases |
purchases#index |
When we make a request to http://localhost:3000/purchases in our browser, this will be a GET request. The route that matches this request in our Rails application is this top route, and it says that any GET request to /purchases will be routed to purchases#index.
This purchases#index syntax is a combination of two things, and it indicates the name of a controller and a name of an action.
A controller in a Rails application is a class that handles incoming requests and outgoing responses for the same kind of thing. In our application, the controller that serves this GET /purchases route is called PurchasesController, and it lives at app/controllers/purchases_controller.rb. That controller will handle all the actions that users can take with purchases within this application.
The action for this particular route is defined as a method inside this controller. When you hear "action" in a Rails application, you can think of it as being synonymous with "method defined inside a controller". Let’s look at the method for the index action now:
  # GET /purchases or /purchases.json
  def index
    @purchases = Purchase.all
  end
This index method calls out to a class called Purchase. This is a class that was generated when we ran our scaffold generator, and it’s defined in app/models/purchase.rb:
class Purchase < ApplicationRecord
end
This class inherits from another class called ApplicationRecord, which was generated when we created our application:
class ApplicationRecord < ActiveRecord::Base
  self.abstract_class = true
end
This class inherits from ActiveRecord::Base, and it’s ActiveRecord::Base that defines the all method we’re using in the index action of the PurchasesController.
This Purchase.all call will run a query on our database to find all purchases that currently exist. There aren’t any right now, which is why we’re seeing a nearly blank page!
When the controller calls Purchase.all, it assigns the result of that call to @purchases, an instance variable.
The next thing that is used is called a view. A view is a template that is used to show information collected from our controllers. By default, actions within controllers will always render views that match the action’s name. The view that will be used to show the information collected by this index action is a file located at app/views/purchases/index.html.erb:
<p style="color: green"><%= notice %></p>

<h1>Purchases</h1>

<div id="purchases">
  <% @purchases.each do |purchase| %>
    <%= render purchase %>
    <p>
      <%= link_to "Show this purchase", purchase %>
    </p>
  <% end %>
</div>

<%= link_to "New purchase", new_purchase_path %>
This view is written mostly in HTML, but you’ll notice a few extra things about it too. There’s two special kinds of tags here, called ERB tags. There’s <% %> and <%= %>. This kind of view is often referred to as an HTML+ERB view, as it is using another templating language called ERB along with HTML.
Inside <%= %> ERB tags, we evaluate Ruby code. This code runs, and whatever the Ruby code outputs will be displayed on the page. When we use an <% tag, the Ruby code is only evaluated, and the return value of that code is not put onto the page.
This view will be processed by Rails when it serves the request for GET /purchases, the Ruby code will be executed and the result will be pure HTML. Here is what the view is currently outputting:
<p style="color: green"></p>

<h1>Purchases</h1>

<div id="purchases">
</div>

<a href="/purchases/new">New purchase</a>
There’s an empty div there where our purchases should go, but we don’t have any yet. We’ll see these appear soon.
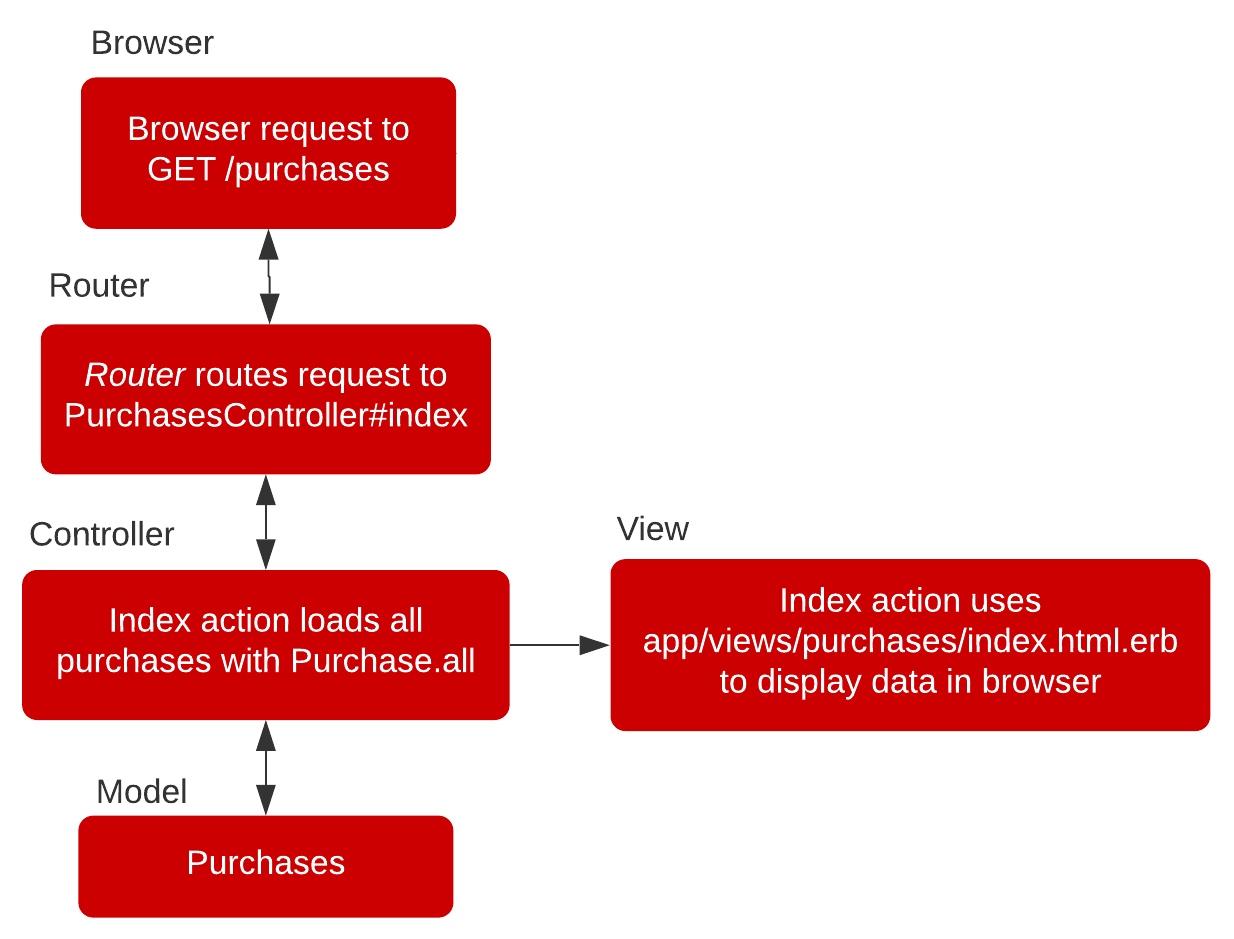
So we have now seen how this page is built by Rails:
The way that this content gets on the page is:
-
The browser makes a request to
GET /purchases -
The router routes the request to the
indexaction insidePurchasesController -
The
indexaction attempts to load all of the purchases by callingPurchase.all, wherePurchaseis the model. -
The
indexaction then automatically uses the view located atapp/views/purchases/index.html.erbto display a HTML representation of the data we’ve collected.
Here’s a flowchart to help you understand what’s happening:
We’ve now seen our first example of the big five main components of a Rails application:
-
Routes — tell requests where to go when our application receives a request from the browser
-
Actions — serve requests by collecting data from a model
-
Controllers — a class that groups together related actions
-
Models — a class that is used to interact with our application’s database
-
Views — displays the data that is gathered by the controller
We’ll see these five things feature prominently in this book, as they really are the five pillars that Rails is built upon.
Three of these, the models, views and controllers are critical parts of the Model-View-Controller pattern we mentioned earlier in this chapter. This pattern is commonly used by applications (not just Rails ones!) in the programming world, as it is a nice way of organizing and separating different responsibilities within an application.
Creating a purchase
Now that we have seen how to list purchases, let’s look at another feature of our application that scaffolding has given us automatically: the ability to create a new purchase.
Let’s add a new purchase by going to http://localhost:3000/purchases and then clicking "New Purchase".
On this form, you will see two inputs for the fields you generated when you ran the scaffold generator:
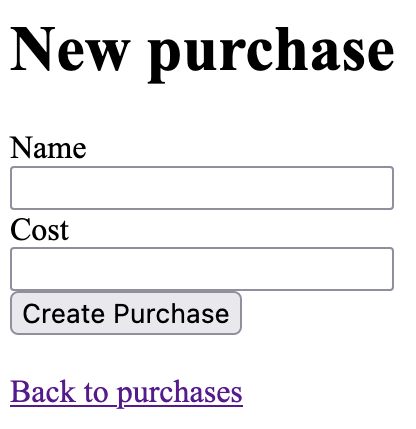
You’ll notice in the URL bar in your browser that the route for this request is localhost:3000/purchases/new.
If we look at the rails routes output again, the route that matches this path is this one:
| Prefix | Verb | URI Pattern | Controller#Action |
|---|---|---|---|
new_purchase |
GET |
/purchases/new |
purchases#new |
This route sends requests for GET /purchases/new to the new action within the PurchasesController. Let’s look at this action now.
# GET /purchases/new
def new
  @purchase = Purchase.new
end
This action initializes a new instance of the Purchase model, just so we can use it in the view. What you see on the page comes from the view located at app/views/purchases/new.html.erb, and it looks like the following listing.
<h1>New purchase</h1>

<%= render "form", purchase: @purchase %>

<br>

<div>
  <%= link_to "Back to purchases", purchases_path %>
</div>
This is an ERB file just like index.html.erb, the two ERB <%= tags here will evaluate some Ruby and output values. Let’s first talk about the render method.
The render method, when passed a string as in this example, tells Rails to use a
partial. A partial is a separate template file that you can include into
other templates to repeat similar code. Let’s go through this file now.
The first half of the form partial
This particular partial is at app/views/purchases/_form.html.erb, and the first
half of it looks like the following listing.
<%= form_with(model: purchase) do |form| %>
  <% if purchase.errors.any? %>
    <div style="color: red">
      <h2><%= pluralize(purchase.errors.count, "error") %> prohibited this purchase from being saved:</h2>

      <ul>
        <% purchase.errors.each do |error| %>
          <li><%= error.full_message %></li>
        <% end %>
      </ul>
    </div>
  <% end %>
...
This half is responsible for defining the form by using the form_with
helper. The form_with method is passed the model option with the purchase local variable and from that it generates a form.
This `purchase` variable comes from the `new` action of `PurchasesController`, which we saw before, but let's look at it again:
new action of PurchasesController
def new
  @purchase = Purchase.new
end
The first line in this action sets up a new @purchase variable by calling
the new method on the Purchase model. This initializes a new instance of
the Purchase class, but doesn’t create a new record in the database. The @purchase variable is then automatically passed through to the new.html.erb view by Rails.
When it gets there, the @purchase variable is then passed to the form partial with this line:
<%= render "form", purchase: @purchase %>This then makes the @purchase instance variable available as that purchase local variable in app/views/purchases/_form.html.erb.
So far, all this functionality is provided by Rails. You’ve coded nothing
yourself. With the scaffold generator, you get an awful lot for free.
Going back to the app/views/purchases/_form.html.erb partial, the block for
the form_with is defined between its do and the <% end %> at the end
of the file. Inside this block, you check the @purchase object for any
errors by using the @purchase.errors.any?
method. These errors will come from the model if the object didn’t pass the
validation requirements set in the model. If any errors exist, they’re
displayed by the content inside this if statement. Validation is a concept that we will be covering shortly.
The second half of the form partial
The second half of this partial looks like the following listing.
...
  <div>
    <%= form.label :name, style: "display: block" %>
    <%= form.text_field :name %>
  </div>

  <div>
    <%= form.label :cost, style: "display: block" %>
    <%= form.text_field :cost %>
  </div>

  <div>
    <%= form.submit %>
  </div>
Here, the form object from the form_with block is used to define labels and
fields for your form. At the end of this partial, the submit method provides
a dynamic submit button; the text on this button when it is displayed in the browser says "Create Purchase", even though we didn’t put that in this partial.
Let’s fill in this form now and click the submit button. You will see this:
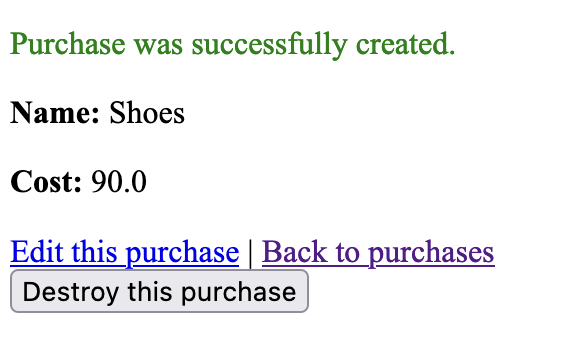
What you see is the result of your submission: a successful creation of a
Purchase. Let’s see how it got there.
When the new.html.erb view is processed by Rails, it will output this HTML code:
<form action="/purchases" accept-charset="UTF-8" method="post">
...
When this form is submitted, it will make a request to POST /purchases. The route that matches this request is this one:
| Prefix | Verb | URI Pattern | Controller#Action |
|---|---|---|---|
POST |
/purchases |
purchases#create |
This submit button posts the data from
the form to the create action within PurchasesController, which looks like this.
create action of PurchasesControllerdef create
@purchase = Purchase.new(purchase_params)
if @purchase.save
redirect_to @purchase, notice: "Purchase was successfully created."
else
render :new, status: :unprocessable_entity
end
endHere, you use the same Purchase.new method you first saw used in the new action. But
this time you pass it an argument of purchase_params, which is actually
another method in this controller.
def purchase_params
  params.require(:purchase).permit(:name, :cost)
end
That method calls params
(short for parameters), which is a method that returns the data sent
from your form in a Hash-like object. We’ll talk more about why you need
this little dance later (in Chapter 3); this is a feature called strong parameters. When
you pass this params hash into new, Rails sets the
attributes [10] to the values
from the form. To save the record to the database, we call save on the newly created instance.
If the return value is true, the action responds by redirecting to the new
@purchase object using the redirect_to method,
which takes either a path or an object that it turns into a path (as seen in
this example). The redirect_to method inspects the @purchase
object, and determines that the path required is purchase_path because
it’s an instance of the Purchase model. This path takes you to the show
action for this controller. The :notice option passed to redirect_to
sets up a flash message. A flash
message is a message that can be displayed on the very next request. This is the
green text at the top of the screen after we create a purchase:
You’ve seen what happens when the purchase is valid, but what happens when it’s invalid? Well, it uses the render method to show the new
template again. We should note here that this doesn’t call the new
action again[11], it only renders the template.
You can make the creation of the @purchase object fail by adding a
validation. Let’s do that now.
Validations
You can add validations to your model to ensure that the data conforms to certain rules, or that data for a certain field must be present, or that a number you enter must be greater than a certain other number. You’re going to write your first code for this application and implement both of these things now.
Open your Purchase model, and change the entire file to what’s shown here:
class Purchase < ApplicationRecord
  validates :name, presence: true
  validates :cost, numericality: { greater_than: 0 }
end
You use the validates method to define a validation that does what it says on the box: validates that the field is present. The other validation option, :numericality, validates that the cost attribute is a number and then,
with the :greater_than option, validates that it’s greater than 0.
Let’s test these validations by going back to http://localhost:3000/purchases, clicking "New Purchase", and clicking "Create Purchase". You should see the errors shown here:
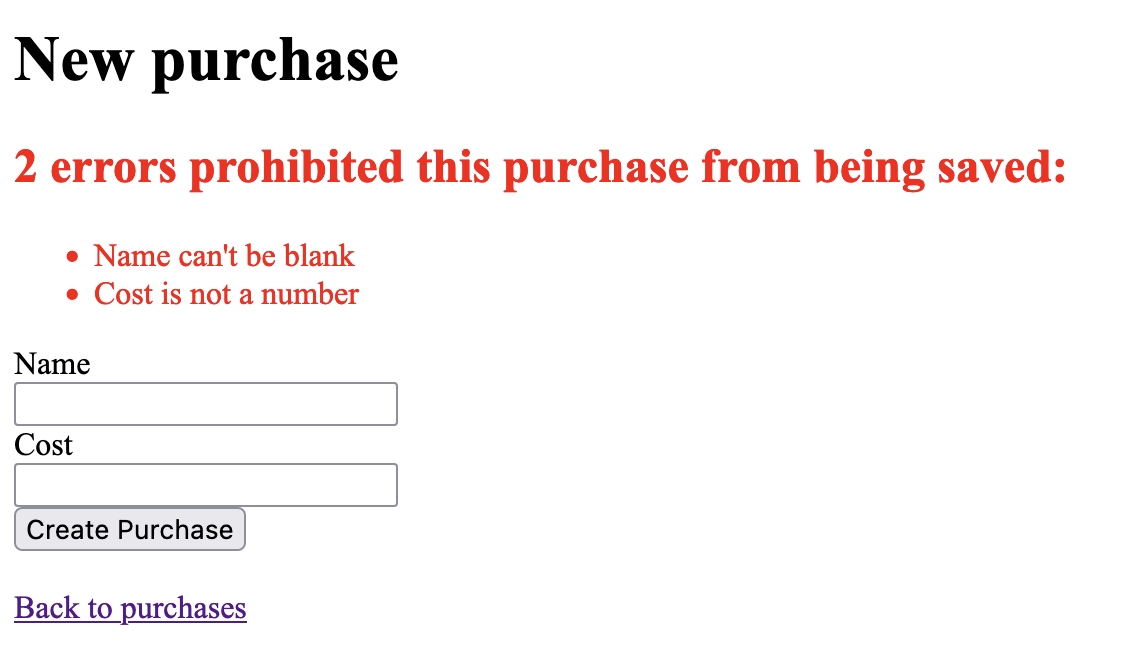
Great! Here, you’re told that name can’t be blank and that the value you entered for cost isn’t a number. Let’s see what happens if you enter "foo" for the Name field and "-100" for the Cost field, and click "Create Purchase". You should get a different error for the Cost field now:
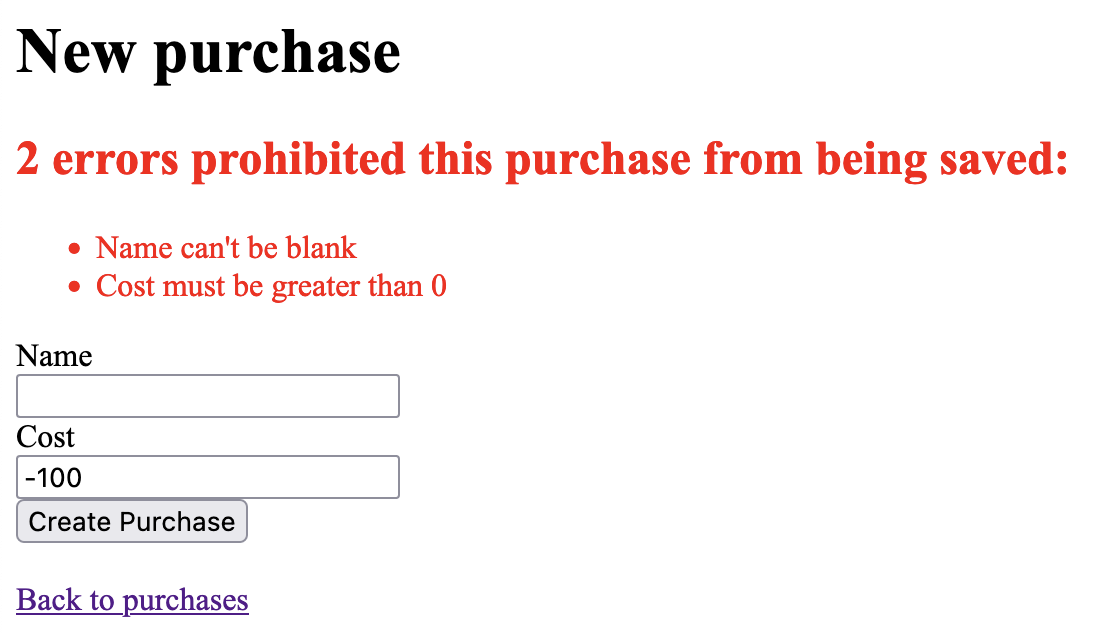
Good to see! Both of your validations are working. When you change Cost to 100 and click "Create Purchase", the value should be considered
valid by the validations and take you to the show action. Let’s
look at what this particular action does now.
Showing off
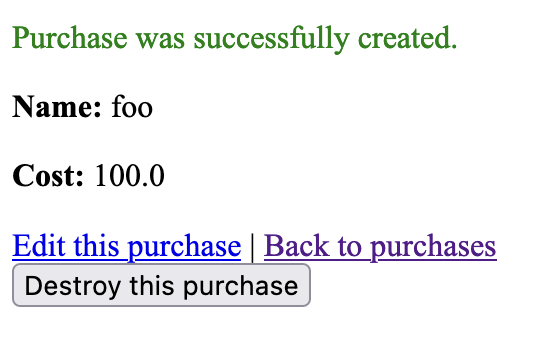
After creating a purchase, we arrive at a page that displays the information of the purchase we have just created:
The URL for this page is http://localhost:3000/purchases/2. The number at the end of the URL is the unique numerical ID for this purchase. The route that matches this path is this one:
| Prefix | Verb | URI Pattern | Controller#Action |
|---|---|---|---|
purchase |
GET |
/purchases/:id |
purchases#show |
This path goes to the show action in PurchasesController. Let’s look at that action now:
def show
end
This action is blank, but Rails will still render the related view. Let’s look at that view for the show action:
<p style="color: green"><%= notice %></p>

<%= render @purchase %>

<div>
  <%= link_to "Edit this purchase", edit_purchase_path(@purchase) %> |
  <%= link_to "Back to purchases", purchases_path %>

  <%= button_to "Destroy this purchase", @purchase, method: :delete %>
</div>
On the first line is the notice method, which displays the notice set on the redirect_to from the create action.
After that, we see a call to <%= render @purchase %>. This is some Rails "magic" that takes the class of the passed-in object, and tries to render a partial matching that name. In this case, that partial will be called purchases/_purchase.html.erb.
You might expect the @purchase object to be defined in the show action of PurchasesController:
show action of PurchasesController
def show
end
But it is not! Instead, this @purchase object is defined by a before_action in this controller, at the very top of the class:
set_purchase before_action in PurchasesController
class PurchasesController < ApplicationController
  before_action :set_purchase, only: %i[ show edit update destroy ]

  ...

  # Use callbacks to share common setup or constraints between actions.
  def set_purchase
    @purchase = Purchase.find(params[:id])
  end

  ...
end
A before_action method will be executed before every action specified in the only option: hence the name before_action. The find method of the Purchase class is used to find the record with the ID of params[:id] and instantiate a new Purchase object from it (params[:id] being the number
on the end of the URL). We can know that the parameter will be called :id if we look at the URL in our routes again:
| Prefix | Verb | URI Pattern | Controller#Action |
|---|---|---|---|
purchase |
GET |
/purchases/:id |
purchases#show |
Where we have :id in the routes, whatever value is there in the path will be made available as params[:id] in a controller.
Going back to the view for this show action — app/views/purchases/show.html.erb — we now know where @purchase is coming from. The partial at app/views/purchases/_purchase.html.erb is then used to display information about this purchase:
<div id="<%= dom_id purchase %>">
  <p>
    <strong>Name:</strong>
    <%= purchase.name %>
  </p>

  <p>
    <strong>Cost:</strong>
    <%= purchase.cost %>
  </p>

</div>
This partial will display the name and cost of any purchase in this application.
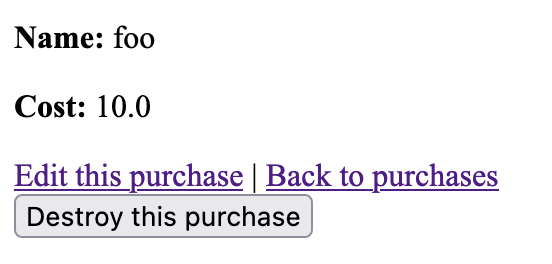
Let’s go back to the show view now, and we’ll look at the links and buttons at the bottom:
<div>
  <%= link_to "Edit this purchase", edit_purchase_path(@purchase) %> |
  <%= link_to "Back to purchases", purchases_path %>

  <%= button_to "Destroy this purchase", @purchase, method: :delete %>
</div>
At the end of this file is link_to, which generates a link using the first argument as the text value, and the second argument as the href for that URL. The second argument for link_to is a method: edit_purchase_path. This edit_purchase_path method is provided by the resources :purchases line in config/routes.rb, and we would call it a routing helper method.
Let’s look at our routing table one more time. Particularly, let’s look at the line that shows us the edit route:
| Prefix | Verb | URI Pattern | Controller#Action |
|---|---|---|---|
edit_purchase |
GET |
/purchases/:id/edit |
purchases#edit |
The "Prefix" column shows the prefix that we can use for this route, and to get the path to that route we use edit_purchase_path. This will take us to the edit action within PurchasesController. Let’s take a look at that flow now.
Updating purchases
Let’s change the cost of the "foo" purchase now. Perhaps it only cost 10. To change it, go back to http://localhost:3000/purchases, click the "Show this purchase" link under the "foo" purchase to go to the show page, then click "Edit this purchase". This will go to the route provided by edit_purchase_path route, which will be /purchases/2/edit. In our browser, we’ll see the route being http://localhost:3000/purchases/2/edit.
On this page, you should see a page that looks similar to the "New Purchase" page:
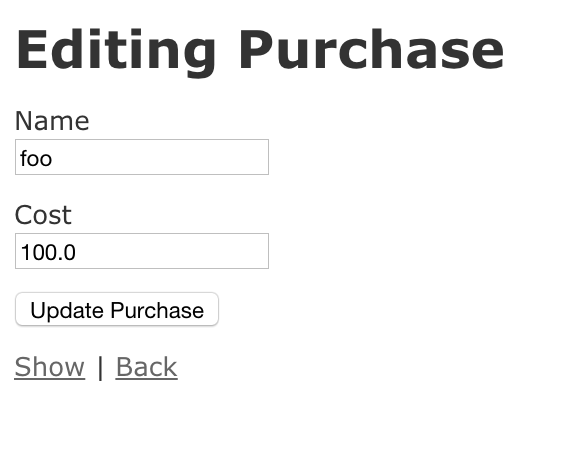
This page looks similar because it reuses the app/views/purchases/_form.html.erb partial that was also used in the template for the new action. Such is the power of partials in Rails: you can use the same code for two different requests to your application. The template for the edit action this action
is shown in the following listing.
<h1>Editing purchase</h1>

<%= render "form", purchase: @purchase %>

<br>

<div>
  <%= link_to "Show this purchase", @purchase %> |
  <%= link_to "Back to purchases", purchases_path %>
</div>
For this action, you’re working with a pre-existing object rather than a
new object, which you used in the new action. This preexisting
object is found by the edit action in PurchasesController, as shown here.
edit action of PurchasesController
def edit
end
Oops: it’s not here! The code to find the @purchase object is identical to
what you saw earlier in the show action: it’s set in before_action which runs
before the show, edit, update and destroy actions.
def set_purchase
  @purchase = Purchase.find(params[:id])
end
Back in the view for a moment, at the bottom of it you can see two uses of
link_to. The first creates a "Show" link, linking to the @purchase object,
which is set up in the edit action of your controller. Clicking this link
would take you to purchase_path(@purchase) or /purchases/:id. Rails will
figure out where the link needs to go according to the class of the object given.
Using this syntax, it will attempt to call the purchase_path method because
the object has a class of Purchase, and it will pass the object along to
that call, generating the URL.[12]
The second use of link_to in this view generates a "Back" link, which uses the
routing helper purchases_path. It can’t use an object here because it
doesn’t make sense to; calling purchases_path is the easy way to go back to
the index action.
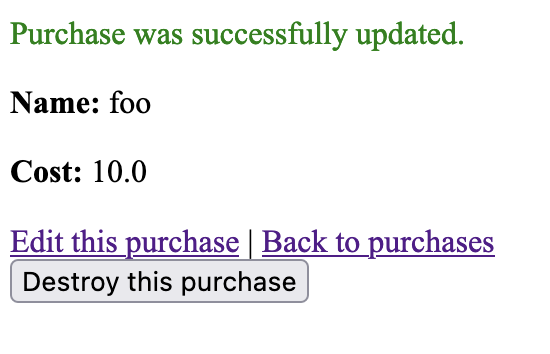
Let’s try filling in this form—for example, by changing the cost from 100
to 10 and clicking "Update Purchase". You now see the show page but
with a different message:
Clicking "Update Purchase" brought you back to the show page. How did that
happen? Click the back button on your browser, and view the source of this
page, specifically the form tag and the tags directly underneath, shown in
the following listing.
...
<form accept-charset="UTF-8" action="/purchases/2" method="post">
  <input name="_method" type="hidden" value="patch" />
...
The action of this form points at /purchases/2, which is the route to the
show action in PurchasesController. You should also note two other things.
The method attribute of this form is a post, but there’s also the input
tag underneath.
The input tag passes through the _method parameter with the value set to
patch. Rails catches this parameter and turns the request from a POST into
a PATCH.[13] This is the second
(of three) ways /purchases/:id responds
according to the method. The relevant line from rails routes is this line:
| Prefix | Verb | URI Pattern | Controller#Action |
|---|---|---|---|
PATCH |
/purchases/:id |
purchases#update |
By making a PATCH /purchases/:id request, the request is routed to the update action in PurchasesController.
Let’s look at this next.
update action of PurchasesController
def update
  if @purchase.update(purchase_params)
    redirect_to @purchase, notice: "Purchase was successfully updated."
  else
    render :edit, status: :unprocessable_entity
  end
end
Just as in the show and edit actions, the @purchase object is first fetched
by the call to before_action :set_purchase.
The parameters from the form are sent through in the same
fashion as they were in the create action, coming through as
purchase_params. Rather than instantiating a new object by using the new
class method, you use update on the existing @purchase object. This does what it says:
updates the attributes. What it doesn’t say, though, is that it validates the
attributes and, if the attributes are valid, saves the record and returns
true. If they aren’t valid, it returns false.
When update returns true, you’re redirected back to the show
action for this particular purchase by using redirect_to. If the
update call returns false, you’re shown the edit action’s
template again, just as back in the create action where you were shown the
new template again. This works in the same fashion and displays errors if
you enter something wrong. Let’s try editing a purchase, clearing the name field’s value, and then clicking "Update Purchase". It should error exactly like the create method did:
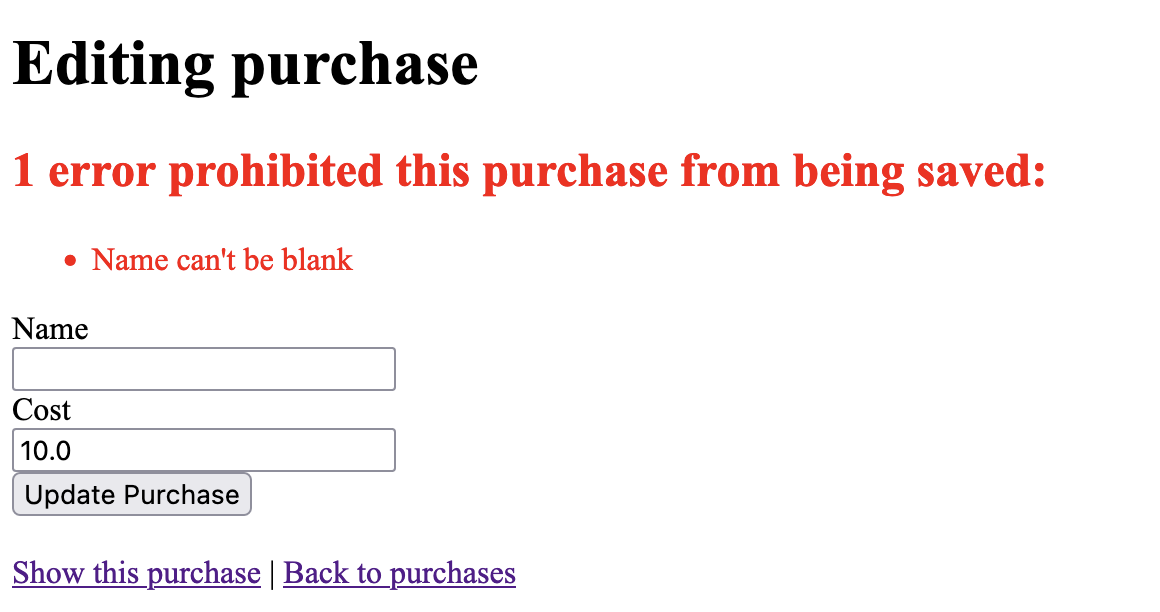
As you can see by this example, the validations you defined in your Purchase
model take effect automatically for both the creation and updating of records.
What would happen if, rather than updating a purchase, you wanted to delete it? That’s built in to the scaffold, too!
Deleting
In Rails, delete is given a much more forceful name: destroy. This is another sensible name, because to destroy a record is to 'put an end to the existence of'.[14] Once this purchase’s gone, it’s gone for good.
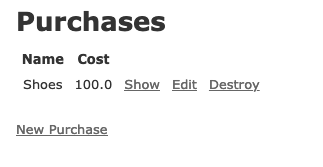
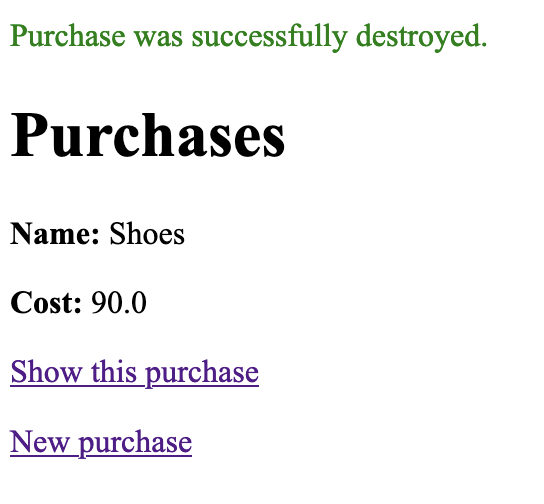
You can destroy a purchase by going to http://localhost:3000/purchases/2 and clicking the "Destroy" button:
When that purchase is destroyed, you’re taken back to the purchases index action. You’ll see that the record no longer exists. You should now have only one record:
How does all this work? Let’s look at the app/views/purchases/show.html.erb view, and its Delete button:
<%= button_to "Destroy this purchase", @purchase, method: :delete %>A button_to in Rails works similarly to a link_to. However, it generates more than just a button. If we were to look at the HTML generated by this one line, we would see all of this:
<form class="button_to" method="post" action="/purchases/1">
  <input type="hidden" name="_method" value="delete" autocomplete="off">
  <button type="submit">Destroy this purchase</button>
  <input type="hidden" name="authenticity_token" value="..." autocomplete="off"></form>
</form>
This button_to generates a whole form! When that button is pressed, it will submit this form. The _method field will route this request to the destroy action:
| Prefix | Verb | URI Pattern | Controller#Action |
|---|---|---|---|
DELETE |
/purchases/:id |
purchases#destroy |
Let’s look at this action now:
destroy action of PurchasesController
def destroy
  @purchase.destroy
  redirect_to purchases_url, notice: "Purchase was successfully destroyed."
end
This action destroys the record loaded by before_action :set_purchase by
calling destroy on it, which
permanently deletes the record. Then it uses redirect_to to take you to
purchases_url, which is the route helper defined to take you to
http://localhost:3000/purchases. Note that this action uses the
purchases_url method rather than purchases_path, which generate a full URL
back to the purchases listing.
That wraps up our application run-through!
Takeaways
Rails is a conventions-based framework
Rails follows strict conventions, such as MVC (Model View Controller). With these conventions, every Rails application is built in much the same way, which allows developers to be able to work on any Rails application with ease.
This also means that we’re not going to have to make decisions about the architecture of our Rails application. Rails has made those decisions for us already, and so we can get started on building our application right away.
The five main pillars of a Rails application
The five main pillars of a Rails application are:
-
Routes
-
Controllers
-
Actions
-
Models
-
Views
Routes tell our application what controller and what action should serve our request. Actions that work on the same resource (a purchase in our application) are grouped within a single controller. To put it simply: routes are a way to match a request’s path to a controller and an action within the application.
Controller actions use a model to interact with the database. This can be anything from creating new purchases, to finding all purchases, to updating purchases, to deleting purchases. Any actions that we take on our purchase data goes through our model first.
Finally, the views are used to combine HTML and Ruby to produce dynamic HTML content which is then served to our browser. Without these, we wouldn’t be able to see the data that the controller was fetching in the first place!
The scaffold generator gives us a lot
The scaffold generator provides us with a total of seven different actions we can do on a particular resource:
-
index- Show a list of purchases -
show- View a single purchase -
new- Display a form for creating a purchase -
create- Create a purchase and store it in the database -
edit- Display a form for editing a purchase -
update- Applies an update to a purchase -
destroy- Deletes a purchase
The scaffold generator gave us these actions, and their relevant templates. It’s a great example of how to quickly build something with Rails.
Summary
In this chapter, you learned what Rails is and how to get an application started with it: the absolute bare, bare, bare essentials of a Rails application. But look how fast you got going! It took only a few simple commands and an entire two lines of your own code to create the bones of a Rails application. From this basic skeleton, you can keep adding bits and pieces to develop your application, and all the while you get things for free from Rails. You don’t have to code the logic of what happens when Rails receives a request or specify what query to execute on your database to insert a record—Rails does it for you.
You also saw that some big-name players—such as Twitter and GitHub—use Ruby on Rails. A wide range of companies have built successful websites on the Rails framework, and a lot more will do so in the future. Rails also has been around for a decade and a half, and shows no signs of slowing down any time soon.
Still wondering if Ruby on Rails is right for you? Ask around. You’ll hear a lot of people singing its praises. The Ruby on Rails community is passionate not only about Rails but also about community building. Events, conferences, user group meetings, and even camps are held around the world for Rails. Attend these, and discuss Ruby on Rails with the people who know about it. If you can’t attend these events, the Ruby on Rails forum at https://discuss.rubyonrails.org/, not to mention Stack Overflow and a multitude of other areas on the internet where you can discuss with experienced people what they think of Rails. Don’t let this book be the only source for your knowledge. There’s a whole world out there, and no book could cover it all!
The best way to answer the question "What is Rails?" is to experience it for yourself. This book and your own exploration can eventually make you a Ruby on Rails expert.
When you added validations to your application earlier, you manually tested that they were working. This may seem like a good idea for now, but when the application grows beyond a couple of pages, it becomes cumbersome to manually test it. Wouldn’t it be nice to have some automated way of testing your applications? Something to ensure that all the individual parts always work? Something to provide the peace of mind that you crave when you develop anything? You want to be sure that your application is continuously working with the most minimal effort possible, right?
Well, Ruby on Rails does that too. Several testing frameworks are available for Ruby and Ruby on Rails, and in chapter 2 we look at one of the major ones: RSpec.